Making blog

When I went to visit the school we also talked about what the largest amount of time you could buy might be - we discussed what you would do with a whole day of time. It felt like a whole day of time needed to be a big container so I thought of using a keg for this. I started adapting the branding to work across this differently shaped container. I thought that the big container also had potential to play even more with clock mechanisms, so I got to work adding a working clock pointer. The part that contains the mechanism and the pointer itself have been laser cut from plywood and painted to match the keg and the rest of the branding.
I also had help from an another little inventor for this one!
Now the cans are ticking; it is time to apply the labels. Thanks to the help from the pupils, we’ve created four different types of time, each with their own colour and unique set of ingredients. Now I just need to stick them to about 40 cans!
Once I’d got the branding sorted I got to work on what would be contained in the can. I thought it would be a fun idea to make the cans tick so that people could hear them and it would also emphasise the concept. For this I used clock mechanisms that I needed to adapt to fit into the can and for the pointers to tap the inside of the can to make a sound. I needed to come up with a slightly different method for the smaller cans so that the mechanism could fit in to them.
Visiting the school where Richard works was such a fun experience. The pupils got really involved and came up with some wonderful extra ideas through our conversations together as a class. We talked about what different times there might be, what ingredients the time would have, what the effects of stopping time for the drinker would be, and when it might be right or wrong to use a can of time.
Each student also signed paper, as I had an idea of having an individual on each can as the ‘mixer’ of this particular batch. The pupils also selected one of the design route to go with, they liked it because they thought it felt like a luxury product and also was the closest to the original drawing Richard had sketched.
I’m really excited to get started on packing time in cans. I loved the idea - it’s such a playful concept to work with.
Like all my projects, I’m starting by playing with three different possible design routes to show Richard the pupils at his school to see which direction would be best to go in.
Each route gives the time a different feel, from a more playful and retro look to a product that looks a little more premium.
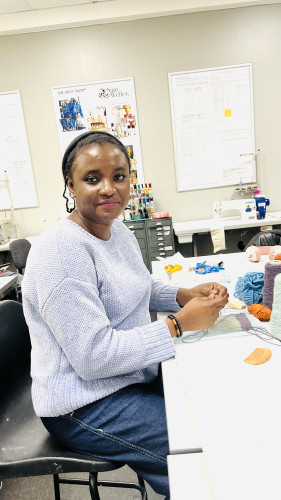
The toile (Prototype) successfully fulfilled its purpose, allowing me to refine the fit and finalise the placement of every feature. With these decisions confirmed, I began constructing the final garment. The photographs capture the making process, from the initial stages of construction through to the finished garment, showcasing the craftsmanship, attention to detail, and care invested in bringing the design to life.
Thank you for following the journey from concept to completion. I hope you've enjoyed seeing this project come to life as much as I enjoyed creating it. 😊 Until the next design adventure! ✂️🧵🪡👕
Today I took to the machines for some extra help constructing the Teacher Survival Belt. First I had to design all of the elements I either wanted to cut or engrave, so I used a programme called Illustrator to do this. The lines in red will be engraved, the ones in black will be cut, and the blue ones are just guide lines which will be ignored.
I also cut out two hands which will go inside the glove to make the extendable hand rigid. I'll probably stuff the glove with some soft material too afterwards to make it softer and squishier. But this wooden template will make sure it holds it's shape.
This week I started to construct the final belt. I began by sewing elastic onto the belt to hold the infinite whiteboard pens. I also made a sheath for the extendable arm to cover up the metal extending mechanism. I have a small child's glove as the base for the hand but I'm going to be laser cutting a wood template to go inside it to make it more rigid.
To put all the creative ideas of Evie, Zuzanna, Isabelle, Mia, and Joyce together, I first needed to make a toile (prototype) of the garment to place all the elements in the positions visualised by all five inventors of the hoodie. During the making of the toile, I was able to see what works and what changes to make to turn their dreams into reality.
Next stop: turning even more of the Little Inventors' amazing ideas into reality. See you soon! 😊
Attached the claws using wire so I could get a good angle for the bone. Once I got all of them on I started making the all important poop and fly details from the drawing and finished off some details on the dog itself.

Take a look at the gif with this post to see the Feel Good Friend in action.
It’s done! This was a great project to work on and I’m really pleased with how it’s come out, I hope you all agree.
Turning the crank wheel to rotate the little sunflowers and dispense a positive affirmation sticker to take away with you is really satisfying. The clacking and whirring that the internal parts make along with the feel of the textured wood and 3D printed plastic parts make this a really tactile machine that add to its fun and whimsy.
I feel I’ve done the initial 3 ideas justice with the end result with elements of each idea included and woven together.
The final sculpture! Paired with some dark toys, it shows how the light can't touch the objects inside.
I collected names and ideas for branding from the kids I visited at the primary school. These names were all so creative and I read through all their pages, one thing stood out. Owls! The name "Night Owl" came up multiple times, and I think it suited the starry pattern on the torch. I created this logo and cut it out in vinyl, and then applied it.
This was the hardest part, applying the fabric to the frame. I cut out 4 panels of organza fabric to wrap around and double over for extra darkness. Then I machine stitched the bottom seam, pinned it to the frame and hand stitched them on. This was tough and time consuming, but using a curved upholstery needle made it much easier. The final result is a block of darkness, just as I wanted.
One thing the class had asked me was: "what if there was a way to change how dark the shadow was?" So, instead of a light switch I would make a dial like a dimmer switch! A great idea that adds more realism to the invention.
I used my vinyl cutter to make some numbers. And I made the on/off symbol look like a moon as a little easter egg for the keen eyed viewer too!
I started by painting the torch in the northern lights theme, but it didn't seem very inviting, or look very much like the northern lights. I instead went for the schoolkids other favourite, stars! I layed down a dark purple acrylic and added blue streaks for variation and depth.
Then came the nost fun part. Using a stensil, I sprayed on layers of pink, yellow and cream to make the stars. They appear to glow nicely. Much better!
In the animation, there will be a lot of rain, and instead of hand-animating each raindrop, I utilised the particle system in Moho, the software I'm animating in. It needs some fine-tuning to get the exact effect I want, but this is the base of the animation.
Once I’d got the dog standing, I started work on the main part of the Poop Packer itself. I needed the base unit to be well attached so when the arms went on it didn’t slide and tip the dog.
I then played about with the shape of the arms to get them in the right place at the right angles, slotting them into the base unit from above and making a start on the holding claws
The mood selector is ready on the crank wheel. Now you can tell the Feel Good Friend how you’re feeling before you turn the handle. What mood would you choose today?