
Making blog
I'm excited to begin creating the Stress Busting Hoodie, a sensory comfort garment inspired by the imaginative ideas of the five Little Inventors. The goal is to bring together several inventive concepts into one comfortable, playful, and inclusive hoodie that encourages relaxation, creativity, and self-expression.
I noticed that four of the Little Inventors did not specify any colours for their designs. Only Evie selected black and burgundy for her squeezy sleeves, showing that the Little Inventors were more focused on the functionality and sensory features of the hoodie than on its colour palette. This allowed me to develop colours that would complement their ideas while keeping the garment inclusive and appealing to as many people as possible. I chose a warm grey for the main body because it is a neutral, calming colour that works well across different ages and genders, allowing the sensory features to take centre stage. To introduce moments of warmth, energy, and discovery, I added a mustard yellow hood lining, burnt orange pocket details, and bright blue sleeve pocket zips. Together, these colours create a playful contrast while maintaining a balanced and welcoming aesthetic that reflects the Stress Busting Hoodie's focus on comfort, creativity, and playfulness.
Every feature of the hoodie celebrates ideas contributed by the Little Inventors. Where two or more inventors shared similar concepts, I carefully merged their ideas into a single feature so that each invention is represented while creating one cohesive garment.
The oversized padded hood combines Mia's large comforting hood with Zuzanna's pillow hood concept, featuring a soft pillow-like construction with a cosy fleece lining, creating a comforting place to rest or relax. Inside the sleeves are hidden zip pockets concealed within the sleeve seams, inspired by Joyce's invention, while the back of the hoodie features three stars inspired by Zuzanna's original sketch. This distinctive detail preserves one of the key visual elements from her design and gives the hoodie its own unique identity.
The cuffs combine Mia's stress relieving cuff concept with Evie's sensory textures, featuring built-in squeeze cushions and safe tactile silicone textures that allow the wearer to relieve stress naturally through touch. The hood drawcords combine ideas from Zuzanna and Isabelle, using thick, soft cords finished with plastic ends, while the large kangaroo pocket merges Mia's tactile pocket concept with Zuzanna's hidden fidget ideas to encourage sensory exploration.
One of the most exciting features is the dedicated removable Bluetooth speaker pocket, inspired by Isabelle's Happy Hoodie, allowing calming music or relaxing sounds to become part of the sensory experience while remaining practical and easy to remove before washing.
It has been incredibly rewarding to study each invention and thoughtfully combine the different ideas into a single design that reflects the creativity of the Little Inventors. I'm looking forward to bringing the Stress Busting Hoodie to life and will be sharing the making process over the coming days.
Stay tuned as I continue transforming the Little Inventors' creative ideas into real, wearable designs. See you soon! ✂️👋😊

Design is well underway! I've taken the concept sketch and AI render I wrote about in the previous blog post to start designing and making the actual Feel Good Friend.
The design will have 2 main materials; 3D printed PLA parts and oak wood panels. I think this mix of silver and grey plastic with the natural wood will give a really nice contrast, especially against highlights from silver and black screws securing the whole thing together. Along with the flowers under the bell jar, I'm really liking this mix of modern materials made with a recent manufacturing process alongside materials taken from nature.
So far I've made the top and bottom panels, side mounts for the internals and the crank wheel which will power the whole machine. The crank wheel has a black disk in its centre which spins round and will be used to choose the mood you're feeling from a selection of images.
There's a little bit of design work to finish off on the internals to make sure all the gears run smoothly, turning both the flowers under the bell jar and the sticker dispenser to give you your positive affirmation message. But it's nearly there and coming together really nicely!
I had the wonderful opportunity of meeting the primary school children who are taught by the inventor of the torch. They approved of my idea, and definitely had a lot to say. Out of my designs for the paint-job, they really liked the glow-in-the-dark stars and the northern lights idea (which some of them proudly corrected to aurora borealis).
I also gave them the opportunity to give me a tech name for the invention to put on the side. Some chose imagery of owls, nighttime, cats or stars, which were all great.
I needed a way to achieve a cone shape with fabric, so I created a frame out of wire and small pipes. Then, a shadowy organza fabric can be sewn over the top to create my beam. I poked the wires into the cardboard, then glued the torch closed fully.
I sourced some components as the base for the belt. It was tricky to find some of the pieces in the right size as everything needs to fit on the belt and look in proportion. Now I have the basics of the components laid out (and a few more not in the image) I can visualise how it's going to look. The next step is to think about attaching things securely and adding more details. I'm going to laser engrave some of the pieces so that it's really clear what each part does.
Miss Moss's invention drawing is very clear and detailed so it was easy for me to get started bringing the Teacher Survival Belt to life. First I began thinking about the material for the belt, I wanted it to be stretchy and comfortable for a teacher to wear all day in the classroom. I then started thinking about each component individually and what they could be made from. I did a sketch to itemise all of the different elements and thought about the different materials. I will make some things from scratch and I will buy some of the basic component and then adapt them with added labels or extra features.
Today I jumped on my sewing machine, as the hands are ready to become nice and fluffy! Amelia wished for pink arms, so I stitched two pink fabric tubes to create the arms and stitched around the hand shape. They are now so soft and lovely to hug! I then hand stitched the blue fabric all over the chair and attached the arms. The chair is so comfy and soft, definitely feels like a warm hug.
Today I created the very important big hands for the hug chair! I first created a paper template of the hand, so I knew exactly what size I'd like it to be. Once I was happy with my paper template size, I drew around the template on a large sheet of upholstery foam. I then cut it out and sanded it smooth with my sander.
Next I will create the arms and start covering everything in the fluffy fabric!
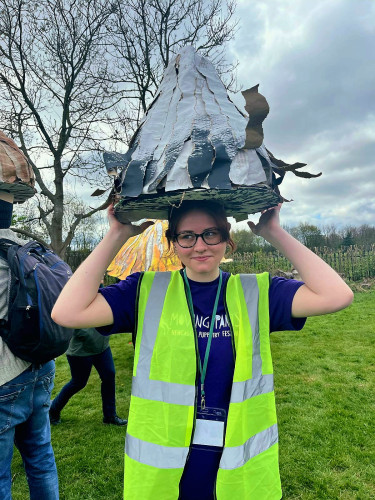
Sometimes I struggle with drawing things in perspective, so what I do is make the environment roughly in a 3D software like Maya or Blender and use that as a reference. It helps me to understand the object better.
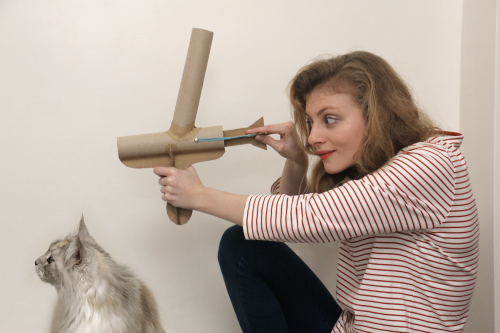
I thought it might be a good idea to make some instructions on the wheel handles to explain simply what each handle does so I made some lettering files in Adobe Illustrator and cut them out on a laser cutter. I also realised that people using the automata should see an instruction when the roll runs out so that they don't keep rolling and tear the wallpaper entirely, so added in a little instruction when you get to the end of the paper roll.
These 3 ideas for a Feel Good Friend are amazing. I hope I can do each individual idea justice when merging their intent together into a hybrid super-design!
After a lot of sketching, I think I've come up with something that captures the essence of each idea into a single machine.
From Aubery's Nature Globe, I've taken the bell jar on top to contain flowers, helping you relax by feeling closer to nature. From Lauren's Affirmation Vending Machine, I've taken the mood selectors, allowing you to reflect on how you're feeling today and input that into the machine. From Louise's Positivity Popper I've taken the moving display of flowers to lighten your mood and make you smile. And from all of the ideas, I've included a method of dispensing positive affirmations, in the form of stickers that you can wear with pride and take away with you.
The way I see this Feel Good Friend machine working is that you begin by selecting your mood on the crank wheel. Reflecting on and acknowledging your mood can help you process it better. You then turn the crank wheel, sending that emotion into the machine. As the crank wheel is turned, the flower bouquet in the bell jar turns, brightening your day. A positive affirmation sticker is then dispensed from the front of the machine, giving you an uplifting message to take away with you.
I sent my concept sketch into AI to see what it may look like when I've built it. What do you think?
After the torch 1.0, I felt like bigger is better. I created my net digitally and used a plotter to transfer the design onto the cardboard. I cut it out precisely and used a hot glue gun to construct it. I love how sturdy this version is, although I'm still unsure how its being attached to the wire frame!
At the beginning of the project I had lots of ideas of how to show a beam of darkness, but during the prototype phase it became obvious what was possible with wire and cardboard. Out of my sketches, I chose for an upright torch supported by its beam with a hole at the bottom to place some items drenched in shadow. In this stage I discovered my torch could be even bigger and cartoon-ier, and my wire frame needed some stronger bones.
It was great to have a zoom call with Amelia and have a chat about her brilliant invention! Rather than a full length sofa, it is going to be a cosy armchair so one person can really feel the lovely hug tightly. I have found an old armchair that is super comfy, I am going to upcycle it for this invention! Amelia said she would love the chair to be light blue and pink and feel like a fluffy blanket. I found the softest fluffy blue fabric that I think will be perfect for the chair!
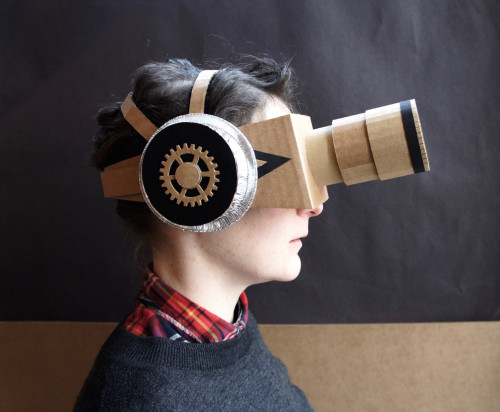
Before I can start making the poop packer itself I need to recreate the drawing of Richard’s dog so I can make sure i make it to fit.
Making curvy animal shapes from flat cardboard can be tricky so I start with rough shapes and tend to use tape at first so I can edit and play about with them while I make decisions, then later go in with glue. I have to work looking at all the additions I make from all sides so the angles and parts look right from all directions! Lots of trial and error.
Key thoughts when starting are:
- I want to make sure it looks as much like a real dog as cardboard can and not like a robot dog.
- I also want to try and capture some of the happy and in motion wee dog energy the drawing has.
I felt fitting to base the cat on the automata on the cat that popped in to the library at the same time I met Pauline, so I started to paint its black and white splodges. To make the cat look furry I used pva glue, flocking and a static machine to apply the strands of fibre so that they stand upright on their ends.
It was great to meet Pauline and chat a bit more about the idea behind her invention, how it was based on a cat she used to have which would scratch and peel off wallpaper from particular areas of the house. It was lovely to hear how inspired she was the Joy Lab challenge, with the brief being a bit of permission to let your mind and imagination wander. I explained where I had got to with the make so far and we were even visited by local feline celebrity Boris the cat who clearly wanted to hear all about the idea too!
I attached the tissue to the wall very carefully with double sided tape and then cut out a big long strip so the tissue so that could wind around the rollers on the inside of the box. I wanted to make sure that that colour of the moving wallpaper lined up properly with the tissue applied to the wall.
Once we had got the cat working I started to build up the body shape more but needed to keep checking that I hadn't created spots that the rods for the arms would catch on the body and get stuck, so sometimes needed to sand a bit away again. The body is made of foam and milliput , a type of epoxy.
I got my dad Brian involved to make the box for the wallpaper to run through. We found the paper needed a few rollers to help guide it. We set about working out how to make the cats paws move too, the arms are attached to rods which turn using the handle on the side of the box. We tried quite a few lengths of the rod and positions of the pivot as it was quite tricky to get the cat to actually scratch the wallpaper - too close and it would tear too much way or get stuck and too far away and it wouldn't interact with the paper. The paws have nails on them so they are a little sharp to scratch the paper. I looked at wallpapers but they were very thick, so to make it easier for the cat to scratch I thought that tissue might work. I found a lovely roll of multicoloured tissue in an art shop which looked like it might work well, it needed to be on a roll so that there was enough of a strip of the paper so that more could be rolled down, and it would take a while to run out before it needed to be replenished.